
- Home
- IVD
- By Technology Types
- By Diseases Types
- By Product Types
- Research
- Resource
- Distributors
- Company
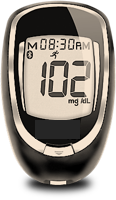
The blood glucose self-monitoring system is an over-the-counter device used to quantitatively measure the glucose (sugar) content in fresh capillary whole blood samples collected from the fingertip. The blood glucose self-monitoring system is intended for use by a single person only and must not be shared with others.
| Control Solution | 1.Gather and check supplies. 2.Allow control solution, vial of test strips and meter to adjust to room temperature for 10 minutes. 3.Wash hands. Dry thoroughly. 4.Gently swirl or invert control solution bottle to mix. 5.Remove one test strip from vial. Close vial immediately. 6.Insert test strip into Test Port. Meter turns on. 7.Remove cap from control solution bottle. Gently squeeze one drop onto a clean tissue. Wipe off bottle tip and discard tissue. 8.Gently squeeze a drop onto a small piece of unused aluminum foil, clear plastic wrap, or waxed paper . Wipe off bottle tip and discard tissue. 9.With test strip still in meter, bring Tip of test strip to top of sample drop after Drop Symbol appears in the Display. Allow drop to be drawn into test strip. 10.Remove test strip from drop when dashes appear across the meter Display. Meter is testing. 11.After testing is finished, result appears in the meter Display with the Control Symbol. 12.Compare result to Control Test Range printed on the test strip vial label for the level of control solution you are testing. If result is in range, system can be used for testing blood. 13.After result is shown, remove test strip from meter and discard. Meter turns off. Recap control solution bottle tightly. |
| Blood | 1.Check Meter time and date before each glucose test. With meter off, press and hold the “ • ” Button until the full Display is shown and begins to blink. Release “ • ” Button. If time and date are incorrect, see Time/ Date Set Up to see the correct time and date. 2.Check supplies. 3.Allow vial of test strips and meter to adjust to room temperature for 10 minutes. 4.Clean and disinfect fingertip. 5.Remove one test strip from vial. Close test strip vial immediately. 6.Insert test strip firmly into Test Port. Meter turns on. 7.Wait until Drop Symbol appears in the Display. 8.Lance fingertip. Allow blood drop to form. 9.With test strip in Meter, bring to top of blood drop after Drop Symbol appears in the Display. Allow blood to be drawn into the test strip. 10.Remove test strip from drop when dashes appear across the meter Display. Meter is testing. 11.After testing is finished, result appears in the meter Display. Record result in log book. 12.Remove test strip from meter and discard according to your Doctor or Healthcare Professional's instructions. Meter turns off. Result is stored in the Memory. |
| Test Sample | Fresh apillary whole blood from the finger or forearm, or control solution |
| Result Range | 20-600 mg/dL |
| Sample Size | 0.5 µL |
| Test Time | 4 seconds |
| Result Value | Plasma equivalent values |
| Assay Method | Electrochemical |
| Power Supply | One 3V lithium battery |
| Battery Life | Approximately 1,500 tests or 2 years |
| Automatic Shut-off | After two minutes of non-use |
| Weight | 0.58 ounces |
| Size | 1.6” x 1.4” x 0.85” |
| Memory Size | 500 results |
|
There is no product in your cart. |
Copyright © 2026 Alta DiagnoTech. All rights reserved.